Showing posts with label DIY. Show all posts

Saturday, July 30, 2016

Fashion Trends 2016 | Sunglasses for your face shape

Dear Fashionistas!


It's officially summers!!
High-time to discuss sunglasses!

So with all your vacation & travel plans dont forget to treat yourself with a great pair of new sunglasses. Sunglasses dont only add instant glamour to your personality, makes you look hotter but they are great for protecting your eyes from UV rays & pre-mature aging.

Gorgeous looking sunglasses are a staple accessory in my collection. I love trying out different shapes, frames & colors to match my style. But buying sunglasses is a task it self. Because we wanna make sure that we get the most flattering frame style to compliment our face shape. Worry not, I have got your covered on this!

Look out for your face shapes to know my suggestions for most flattering frame picks for you. 


Round:
So if you have round face play with geometric shaped sunglasses to emphasize on your different features. Opt for rectangular shape to elongate your face while cat eyes will sharpen your soft features.
Recommended frames: Rectangular & sharp cat eyes.


Square:
Opposite to the round face girls, you should offset your features with curvier frames. Dont opt for squared or defined cornered frames as it with look too flat on your face.
Recommended frames: Butterfly, round, aviators & round cornered cat eyes.


Heart: 
If your have broad brows and narrow chin then you are Kylie Jenner's twin (No, I am kidding). Try out styles with bottom heavy frames to balance out. Shapes that are parallel and extend past the width of your face compliments your jawline. Aviators also look really flattering because the silhouettes contrasts your heart shaped face.
Recommended frames: Rectangular, exaggerated bottoms & aviators.


Oval:
Lucky you! because you have the most wiggle room when choosing eyewear & you are Rihanna twin! You basically get to wear whatever you want. You can opt for anything ranging from round to edgier.
Recommended: Round, Rectangular, aviators, cateye, oversized & the list goes on...


Which one are you picking?
row-of-hearts
Round

Monday, August 3, 2015

10 beauty hacks to try in August

Dear Beauties!

In our busy life we are always looking for short-timed & easier ways to get the things done. Or some useful tips & tricks to help us. While browsing I came across many articles & thought to share 10 of them with you for the month which I feel are really good. So keep reading!


1. Get spa like manicure at home:


2. Wing it perfectly with a spoon:


3. No more clumpy mascara!


4. No more shoe bites/blisters:


5. Intensify your eyeshadow:


6. Save you old mascara wand for applying brow products & shaping them:


7. Highlighting above your browbone:


8. Heat your lash curler for more effective result:


9. Easy DIY makep remover:


10. Get perfect curled lashes:

I hope that you beauties enjoyed these. Do you have any beauty hacks to share? Then feel free to write them in the comment section below. I will be back with another hacks post as they are fun.

Stay Fabulous!

xoxo
A

Sunday, September 28, 2014

10 Amazing beauty uses of Baby powder


Hello Beauties!

Every now and then we come across a very pretty common item that somehow manages to become a staple in our beauty routine. From a cooking ingredient Baking soda to different oils, there are plenty of multiple use products out there. The on I'm excited about recently is Baby powder. This product has some pretty weird & awesome uses, whether you use it as an eyelash primer or soothe some irritated skin. I'm listing below 10 of the best uses of a Baby powder.


1. As a dry shampoo:
Are you out of your favorite dry shampoo? You are running late & don't have time to wash & dry your hairs? this product has got you covered big time.
Sprinkle some little baby powder underneath the top layer of your hairs to absorb the excess oil. If you have dark hairs, mix the Baby powder with the coco powder & for red hairs mix it with some cinnamon to match your hair color. Finger through your hairs to distribute it evenly, comb & style. You are good to go.

2. To prevent chafing:
Before you go out for running or stepping out on a hot day, sprinkle a little amount of baby powder on your thighs to prevent irritating skin.

3. As a sand remover:
If you are off to beach, carry a Baby powder bottle with you. As you are once done with your day & have sand stick anywhere on your skin it will help. Just sprinkle a little amount of Baby powder, rub & the sand will come off easily. As  it absorbs the excess oil, sweat & water which causes it to stick.

4. As an aftershave:
Shake some powder onto your skin once you are done shaving your legs or underarms. The cooling & drying effects works amazing as an aftershave, leaving you feeling fresh.


5. As a lash primer:
If you are looking for a product to give you some volume on your lashes, dust a little product on the roots of your lashes. It will work as a primer & give you fuller & sultry lashes without using the falsies.

6. As a setting powder:
Baby powder is an amazing product to use as a setting powder. Take a large powder brush & apply the minimum amount to keep it translucent. It absorbs the extra oil & stops your skin looking too dewy.

7. As a cooling face agent:
On hot summer nights dust a little amount of baby powder on your pillow & sheets. This will keep you dry 7 cool all night long.


8. As a deodorant:
Ran out of deodorant? No problem. Use baby powder under your arms & it will absorb the perspiration happening, plus leave you with a fresh scent.

9. Before waxing:
use some baby powder on the area you will wax. It will help the wax in grabbing the hairs better &  your skin will be soothed by the cooling effect of the powder.

10. To prevent foot odor:
Before wearing any sneakers or closed toes show sprinkle some baby powder into them. It will take care of any sweat (and therefore odor) that may happen. You can dust some powder post-wearing to keep them smell fresh for the next time you pull them out of your closet.

Saturday, August 9, 2014

3 easy ways to get perfect beach waves

Hello Beauties!


The overall summer look is all about making you look free-spirited & naturally beautiful, & no look is complete without good hairs. You see  loose braids & wavy-sun-kissed locks everywhere at the beach, brunches & parties during summers. While there are braids to cover up you on your bad hairs day or to give you a fresh look but there are beach waves too, to give you that ultimate summer style. They look fabulous with summers dress & colors, they can be done with your day at beach or a more fancy look at night. 

While you go to the beach & let the sea salt filled breeze wisp your hair to get lust-worthy waves, that's not really practical for many of us. So, the next best thing is to creating the look at home. No matter what is your hair texture, there is trick for you. From products to naturally turned strands here I'm sharing 3 ways to rock that look without spending hours to master it. 


1. Post Blow dry bun:
If you are in hurry & have not much time styling your hairs then this is your answer. If you wash your hairs in the morning & want beach hairs for the night out, then blow dry 3/4 of your hairs. While they are still little damp twist your hairs in 3 to 4 tiny buns depending on the volume & length of your hairs. Secure the buns with bobbi pins just above the nape of your neck. These will look cute throughout the day & before the night falls your strands will be dry & ready to wear as waves. 
When you are all done dressed up & done makeup, remove your bobbi pins to take down your buns & run your fingers through them & spray your locks to hold & secure the waves. 


2. Using the curling wand:
Use a thicker curly wand to get the perfect saloon finish beach waves. Just wrap your hairs around the wand & wait for them to be curled, you will be left with beautiful beach waves. For less hair damage & quick curls use a titanium curling wand. But if you don't have a thicker curly wand don't worry you can still get the look. Curl you hairs at night with the thinner curly wand & sleep on them. Next morning just comb them through your finger & spray to hold the curls. You will be left with curls & waves plus it will save you that extra time in the morning. 


3. Braiding your hairs:
Another best way of getting long-lasting beach waves is braiding your hair the night before. Keep in mind that this works great with the thicker hair or you can divide into two braids depending on your hair thickness & the type of look you want. 
Start by spraying your hair with a little water before bed, keeping them damp not wet. Then braid your hair & go to bed in the braid. In the morning, let your strands down, run your fingers through them to separate the locks & spray a strong hold but wearable hair spray. the effect will be more of a back & forth waves. 

All 3 ways will leave you with the effortless chic-hair & all of these can be achieved in 10 minutes. While all deliver great results, curling wand's one is a showstopper. 
I hope you enjoyed reading the post as much as I did writing it & don't forget to share with me below how do you achieve your sexy beach waves this summer in the comment section.

XOXO

Friday, April 11, 2014

Spring clean your makeup bag


Clean up or clear out!
Be honest! When was the last time you had a good clean out of your makeup bag?
Washed all your makeup brushes, threw away those extra cotton buds which were lying hidden at the bottom of your bag. 

Its the time to clear up your table & empty all the contents of your makeup bag on it to see what is really lurking in there. Because the chances are that your makeup bag is in dire need of a clean up as its overflowing with the  timeworn cosmetic. Oh I see a clumpy mascara from last spring, or a gel-liner which dried or some foundation which never matched my skin tone. 

First things first, through all the products in the dustbin which you have never used or haven't missed using in an year or so. Through away all the blushes, eye shadows or powdered makeup product that's crumbled into tiny pieces. As you dont use it for the fear of mess it will make upon opening. Dont wait untill it explodes into your toiletry bag & make it an even bigger mess. 
Check the labels of each products for the expiry date & through them away.You  dont have to keep them because you probably dont see anything wrong with them. 
Put away all the plums, burgundy, maroons & those vampi dark lipsticks as you dont need them for spring or summer. Also put away your heavy coverage foundations because you dont need them in springs of Jeddah!
Throw away any products which is dis-colored or the smell has changed. 


Recommended makeup products for spring:

  • Nudes, pinks & coral lipsticks/ lip pencils.
  • Pink, peachy & nude blush-ons or tints + Highlighter + Bronzer
  • BB & CC cream for better coverage & breathable skin.
  • Light coverage face powder.
  • Your favorite eyebrow product.
  • Mascara + eyeliners. 
  • Some bobbi pins & cotton buds.
  • Lip balm + light moisturizer.
  • Colored eyeliners.
  • Fold-able mirror & hair brush
  • some important makeup brushes


Here are some valuable time frames to respect when it comes to cosmetics:

  • Mascara: 3 months
  • Liquid eyeliner: 6 months
  • Eye & lip pencil: 18 months (always sharpen with a sanitized sharpener)
  • Liquid foundation: 18 months with a pump (9 months with a screw top)
  • Powder (face, blush, bronzer): 18 months
  • Lipstick: 18 months
  • Concealer: 9-12 months
  • Durable makeup sponge: Wash weekly and then toss after two months
  • Brushes: Wash weekly and keep a long time

Top tips for healthy beauty:
  • Eyelashes are naturally filled with bacteria, therefore the moment a mascara brush touches them, it gets contaminated. Repeat the process on a daily basis and over time you get a natural buildup of bacteria increasing the chance of eye infection or an allergic reaction with each use of the product. Hence the three month mark.
  • Needless to say, avoid sharing cosmetics as cross contamination may occur, increasing chances for infection.
  • Be mindful not to store or expose cosmetics to temperatures higher than 85 degrees Fahrenheit (29 Celsius). Makeup left in a car will surely deteriorate faster and unnecessarily test preservatives.
  • Avoid leaving your cosmetics open without lids or caps on your vanity exposed to dust.
  • And most basic of all, always wash your hands before applying your skin care and makeup.

Monday, March 24, 2014

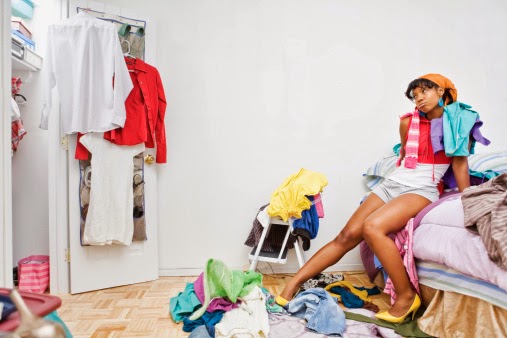
Spring clean your wardrobe


Hello beauties!

The spring has already started with its beautiful colors & its time to clean your closet & makeup stuff to make room for new buys & trends.
Are you having a pull & push fight with your closet? If Yes! Its time to take out all the stuff which you no longer needs for this spring. Is your closet full of stuff which you don't remember owning? Then here is your solution. Choose a weekend or a day out of your spring break, put on your comfy outfit & tie your hairs in a high messy bun. Trying putting on the outfit which is easy to take off or put on as you'll be doing this alot.
For keeping your look up-to-date this spring & knowing what to keep & whats trending, read my trend guide for this spring here.
Here is how you can clean & restock your closet.

Good reasons to through away clothes:
1. They are old & worn.
2. They no longer fit you.
3. You don't feel good or comfortable in them.
4. you've never worn them.


Dividing your stuff into piles:
Start your way through your wardrobe, looking at each item as you go. Divide your stuff in four piles:

  1. Which you are giving away/donating, 
  2. Which you are keeping 
  3. Which you don't need for the season 
  4. Which you are not sure about. 
Self questioning:

  • While separating clothes ask your self these questions: 
  • Does it suit you? 
  • Is it right for the season?
  • Have you worn it in recent months?
  • Are you keeping it because it was expensive or a present? 

The only clothes which you should keep are the ones that fits you, suits you & not too old fashioned.
Pack the clothes in a separate box which you are not sure about & if during that month you haven't missed them that means you don't need them. They can be given away to the charity.


Restocking your wardrobe:
By the end of this you'll find yourself with a much smaller wardrobe. Now its the time to place back what you have kept. Start with separating your clothes into outfits to help identify what's missing.
You'll be needing basics like Tees, leggings, shorts, sundresses & knee length skirts.
Make a list of items which are missing so later on you can go & look out for them to complete your outfits.
You can keep your wardrobe to the limited number of colors to ensure most items are interchangeable.


Accessories:
You don't need all those boots & shoes for the spring so you can pack them up in boxes along with warm hats & scarves. Keep some bright colored & light fabric scarves for your spring & summer. Choose the right bags & jewelry to complete the look of outfit & if you find any piece which you don't need you can pack it up & keep.


Monday, December 16, 2013

Bow Braid Pictorial


Hello beauties!
I'm a big fan of braids & always looking for new things to spice up my braids love. Few weeks ago I saw a post on the web of a girl with an unique hairstyle; the bow braid! I had seen many different braid hairstyles but nothing like this one here! I tried hard to figure it out how to do it without a tutorial but didn’t had much luck. So I decided to look for a tutorial on the web so I could have a more clear idea on how to do it; and it was then when I saw this awesome bow braid tutorial that it is so easy to do and shows you step by step how to do it.
You will need medium/long hair length and some bobby pins. Yes, that’s all you will need for this gorgeous hairstyle. Start by making a “normal” braid on the side of your head such as shown in the picture. After creating the braid, then take different sections of hair and tie it on the braid in order to create the bow effect. Secure it with bobby pins and then go for another sections such as shown in the picture below. The key is to create the right bow, with the right amount of hair and to secure it at the right place but that’s why this tutorial is so awesome.
This hairstyle is perfect for weddings, beach, party’s, birthdays’ any occasion you might think of; or even just for fun. You can create it on your own hair or make it to your best friend, daughter, sister; and so on. Simply follow the steps shown in the tutorial and you will end up with the best bow braid hairstyle ever.

Thursday, December 5, 2013

DIY Lips Exfoliator


DIY Lips Exfoliator
You will need:
  1. Brown sugar      1Tbs
  2. Honey               1 Tbs
  3. Olive oil             1Tbs
How to Prepare:
Mix all the 3 ingredients together well & exfoliate your lips & Voila! you'll get soft & rosy lips. 

What it will do:
This DIY mixture will exfoliate your lips leaving them soft. It will hel in removing dead skin & imroving the colour.

Enjoy


Tuesday, December 3, 2013

Say Hello to gorgeous hairs, 3 Winter Proof Hair Masks

DIY Hair Masks To Help Tame Your Tresses This Winter

DIY hair masks for the winter

If there is one thing I like to complain about, it’s winter hair issues.
I love the cold, I like the dry air, I like the lack of sun but my bad luck as I live in KSA
Its never winters, not in Jeddah atleast. So what? Its winter & cold season around the world. Therefore, I shall write & share the secrets I know.
Cold weather not only can wreak havoc on our skin, making it quite dry, itchy, and flaky during the colder months, but it can also take a toll on our lovely lady locks.
From dry, brittle hair  full of split ends to frizzy, static-prone tresses, our hair needs a little extra DIY TLC every now and then to keep it look at its very best.
How does one do this? Pfffft DIY hair masks of course! Intrigued? Good. Keep reading.

Winter Hair Care

With the change in temperature comes a change in how you manage, treat, and style your hair. Simple habits, such as letting your hair air-dry, can cause more damage than you realize.
With the mercury plummeting, the structure of your hair can be weakened. Wet, or even damp hair can freeze and break more easily, causing split-ends. These split-ends then cause your hair to look even more damaged and dull. Compound that with dry, static-causing air and you’ve got one hairy situation going on.
To avoid this make sure you completely dry your hair before leaving the house, and try to only wash your hair every other day. That way you help to lock your hair’s natural moisture into each strand, protecting it against the harsh elements.
If you find your hair still feels a little dry or damaged, try conditioning it each day while only washing it every other day.
Or you could give one of these 3 DIY hair masks a try.

Bye-Bye Dry Hair

To nourish your dry, winter-ravaged hair, gather up:
Use honey and mayonnaise to make DIY hair masks

  • 1/2 cup of Mayonnaise
  • 2 tablespoons of Honey
Mix the Honey and Mayonnaise until it is well combined and can be easily spread through your hair.
Then just coat your hair with your mixture, cover it with a shower cap, and let it sit for up to 30 minutes.
Then just shampoo and condition your hair as usual and marvel at how freakishly soft your hair feels.
The Mayonnaise helps to infuse your hair with the various fats and proteins it needs to stay strong and resist any future breakages. The Honey, on the other hand, helps to lock moisture into your hair thanks to its humectant properties.
Just make sure you don’t apply this hair mask more than once a week or your hair could start to look a little greasy.

Frizz Fighter

No matter what I do to my hair during the winter, I can never seem to get rid of the frizzies or stop my hair from standing straight up thanks to all the static.
If you feel my pain and want to smooth out your hair, mix up:
How to use avocado to make DIY hair masks

  • 1 ripe Avocado
  • 2 tablespoons of Olive Oil
  • 1 tablespoon of Honey
Similar to the mask above, stir your mixture rigorously until it is completely smooth.
Then just apply it all over your hair, comb through with a wide-tooth comb to make sure it’s evenly coated, and cover with your shower cap.
Leave the mask in your hair for up to 30 minutes before rinsing, shampooing, and conditioning as normal.
Similar to the treatment above, the healthy fats found in the avocado will help to nourish each strand, as well as infusing loads of vitamin E to help give your hair a natural sheen.
In addition to that, the Honey and Olive Oil will help to further moisturize your hair, protect it from future breakage, as well as leave your locks with a natural, healthy shine – something we don’t usually see a lot of during the winter!
Again, be sure to only use this natural hair mask once a week so your hair doesn’t look or feel too heavy.

The Stripper

Okay so I made up that name because I wanted to amuse myself, but this hair mask does help to strip away any lingering build up from products, grease, or just straight up pollution.
And it doesn’t just strip the gunk out of your hair, it also helps to give your hair a good cleansing rinse, as well as combat the static that can build up in our hair during the winter.
All you need is:
how to use apple cider vinegar for DIY hair masks

  • 2 tablespoons of Honey
  • 1 tablespoon of Olive Oil
  • 1 tablespoon of Apple Cider Vinegar
Once you’ve got all your ingredients together, give it a good mix until properly combined and apply evenly throughout your hair.
Be sure to brush through your hair with a wide-tooth comb to ensure you haven’t missed any spots.
Next, cover your head with a shower cap and allow the solution to sit in your hair for an hour. Then just rinse, shampoo, condition, and style as normal.
Not only will your hair feel crazy soft, but it will have a healthy glow to it while also feeling clean and gunk-free!
These masks are great for winter hair maintenance, hardly cost any money, and won’t load your hair up with tons of harmful chemicals.
I think winter just got a lot more tolerable!
But before you run off and whip up your own DIY hair masks, I want to hear from you! Does your hair take a serious beating in the winter and if so, do you have a secret haircare trick for the winter months? Share your stories and recipes in the comment section below!

Monday, December 2, 2013

10 beauty uses of Baking Soda


Baking soda is one of the ingredient that has many beauty uses which you probably never heard before. Such as the top ten below:
1- Facial Scrub: Exfoliate your face skin using baking soda. In a small cup add about three parts of baking soda and one part water. Mix it together until it becomes like a paste and then apply it all over your face.
2-Remove Buildup in Hair: Use this once a week to get rid of the excess buildup from your hair. Add 50/50 shampoo and baking soda then wash your hair with it as you would normally do.


3-Brush and whiten teeth: white teeth are one of the most beautiful face features and you better keep them wait. But the dental prices are not affordable by everyone, that’s why using baking soda to whiten your teeth is one of the best and cheaper ways you will ever hear about.
4-Clean Combs and Brushes:Mix hot water and baking soda to clean the greasy brushes and combs.
5-Soften Cuticles: I know that oil hand is very cheap but in case you don’t have any when needed, try using baking soda instead of the oil. With a soft unused toothbrush exfoliate and soften your cuticles.


6-Blackhead Scrub:Mix 1 Tbsp baking soda with 1/4 cup milk and apply it where the blackheads are. If you don’t see any immediate result, keep repeating this until you are happy with what you see.
7-Clean the roots of your hair: use it as a dry shampoo and apply it on the root for an healthy looking hair.
8-Fix a Splotchy Sunless Tan: summer is about to end and there is no better way to fix those splotchy sunless skin areas than using baking soda.


9-Foot soak: dry foot skin is not only annoying but also not healthy. Use about three tablespoon of baking soda and soak them in a small bowl of warm water before applying your pedicure.
10-Get rid of blemishes: You can now get rid of blemishes by applying a self-made past of baking soda and three drops of lemon juice. Scrub your blemishes with it and you will soon be left with flawless looking skin.

Friday, November 29, 2013

DIY Fur Boots for Fall

Make your own fur boat with few things & in quick steps.

You will need:
  1. 1. Glue gun
  2. Socks
  3. Faux fur
  4. Scissors

How to make: 

  • Cut the sock bottom.
  • Stick the faux fur on top of it with glue.
  • let it dry & wear it with any boots.
Enjoy your fur boots. You can use old boots to spice up the look.

Monday, November 25, 2013

DIY Scattered Powder Fix


Blushes, dry powders, even eye shadow can fall down your hand and smash into pieces! But that can really affect the way you apply it and most of the time it is impossible to hold it in your hand without having pieces fall on the floor; that’s why we often throw them away and purchase new ones but not everyone can afford buying a new one simply because it is broken into pieces. I am about to show you a great and effective way on how to restore a shattered compact. It is very easy and doesn't require much time. Start by covering it with a plastic bag. then make sure to make it smooth by fixing all the areas with a metallic stick or anything you can find. After doing so, take off the plastic bag. and add some drops of alcohol into the compact. Smooth it over with a small brush and then let it dry. The alcohol will dry very fast and you will have your shattered compact back as new! It’s like it never happened! I just wish I could have found this method before throwing so many blushes and dry powders away.
As about the alcohol there is nothing to worry. It dries completely and will not affect your skin. It is very easy to do and I think we should all try this and stop worrying about our broken compacts. Have fun doing it!

Copyright © 2014 Anam Speaks Beauty